













Can You Laser Cut Cardboard?
Laser cutting cardboard is not only possible, but it is also one of the least demanding, most attractive, and potentially most profitable ways to use your laser engraving machine. Cardboard is an ideal material for laser cutting because it's cheap, incredibly fast to process, and great for practical, high-demand projects like rapid prototyping and custom packaging.
That said, if you're considering laser cutting cardboard, it helps to understand the basics: the best types of cardboard for laser cutting, which laser machines to use, and how to prepare your files in software like Adobe Illustrator.

Laser Cutting Cardboard: Why It Works
Cardboard is popular for laser cutting because it's cheap, highly compatible with the process, and great for functional projects like prototyping. Here are four key reasons cardboard laser cutting appeals to makers and designers:
- It's easy to find and very affordable. Compared to other laser materials like acrylic or glass, cardboard is cheap, making it a low-risk material for testing complex 3D designs. You can prototype 3D objects using interlocking slots, living hinges, or stacked topographical layers before committing to more expensive materials like acrylic or plywood.
- It cuts quickly. Cardboard is essentially a combination of paper and wood fibers, which vaporize easily under a laser beam, so you can cut through it at high speeds even with a relatively low-power laser engraver.
- It's very flexible. Cardboard works well across projects with widely varying levels of complexity. Makers take advantage of its rapid cutting speed and structural flexibility for everything from functional engineering to elaborate art.
- It cuts with real precision. Laser cutters achieve intricate, repeatable patterns and clean geometry that would be tedious or impossible to replicate by hand with a utility knife.
What Are the Best Cardboards for Laser Cutting? Types and Thicknesses
There are two main types of cardboard: non-corrugated (solid) and corrugated. This distinction matters for laser cutting because thickness dictates the power and speed your laser needs to cut through it cleanly.
1. Non-Corrugated Cardboard (Solid/Flat)
- Paperboard/cardstock: Thin, single-layer paper used for greeting cards or dioramas. Thickness generally ranges from 0.3mm to 1mm.
- Chipboard/matboard: Dense, compressed paper fibers used for book covers, rigid packaging, and puzzles. It's completely solid, with no interior air gaps. Thickness commonly ranges from 1mm to 3mm.
2. Corrugated Cardboard (Fluted)
Corrugated cardboard is made of a wavy inner layer (fluting) sandwiched between flat linerboards. The air gaps inside keep it lightweight, but they also present a higher fire hazard for laser cutting.
- Single-wall (E-flute or B-flute): Standard shipping boxes or lightweight mailers. Thickness generally ranges from 1.5mm to 3mm.
- Double-wall or heavy-duty: Multiple stacked layers of fluting, used for heavy industrial shipping. Thickness generally ranges from 4mm to 10mm or more.

Corrugated vs. Non-Corrugated Cardboard for Laser Cutting
Many people assume non-corrugated cardboard is inherently better for laser cutting because it has better structural integrity, but that's not necessarily the case. In truth, both corrugated and non-corrugated cardboard make excellent prototyping materials.
The choice between corrugated and non-corrugated cardboard (often called chipboard, paperboard, or matboard) really comes down to a trade-off between structural thickness and fire safety, not one being inherently superior to the other. That said, there are important differences in how you approach each: they require different laser settings, and each comes with its own precautionary measures.
- Corrugated cardboard is a higher fire risk. Smoke and trapped air get locked inside the air pockets in the material, so the laser beam struggles to reach the bottom layer. To cut it safely without starting a fire, you need high-pressure air assist (30+ PSI) to instantly blow out sparks, along with multiple fast passes rather than one slow, hot pass.
- Non-corrugated is superior for great detail. If your design features intricate geometry, fine lines, or small text, chipboard is the clear winner. Because it's a solid sheet, the laser cuts it consistently; like thick paper, it doesn't suffer from structural collapse or uneven edges where the beam would otherwise intersect internal wavy flutes.
- Layering thinner materials can substitute for heavy stock. For structural builds that need real thickness, cutting thick, multi-wall corrugated cardboard directly isn't advisable; it tends to catch fire before the laser can pierce all the way through.
A common workaround among makers is to laser-cut multiple matching pieces from thin chipboard or single-wall corrugated board, then laminate or glue them together to reach the desired thickness.
Corrugated vs. Non-Corrugated Cardboard For Laser Cutting: Comparison Overview
| Feature | Corrugated Cardboard | Non-Corrugated (Chipboard / Paperboard) |
| Material Structure | Three layers: flat top, wavy flutes, flat bottom | Single solid, dense layer of compressed paper fibers |
| Fire / Flare-Up Risk | High: internal air gaps trap oxygen and feed flames | Low: solid material burns predictably with minimal flare-ups |
| Edge Cleanliness | Heavy soot, charring, and potential internal smoldering | Very clean, crisp edges with minor browning |
| Best Use Case | Large structural models, shipping boxes, 3D scale mockups | Intricate stencils, architectural models, small detailed parts |
 Best Laser Engravers for Cardboard Cutting
When it comes to laser cutting cardboard, CO2 lasers are the best overall choice. A decent CO2 laser engraver cuts and engraves cardboard cleanly, efficiently, and with minimal charring, and it gives you the most versatility across thinner and thicker cardboard sheets alike.
High-power diode lasers are also worth considering for cardboard cutting; they're excellent for thin paperboard or light prototyping, but they struggle significantly with thick, multi-walled corrugated sheets.
1. CO2 Lasers (The Gold Standard)
If you want to cut custom shipping boxes or production-level packaging, a CO2 laser is the clear recommendation. CO2 wavelengths are exceptionally well absorbed by organic fibers, so a CO2 laser cuts cardboard cleanly with minimal charring, especially once you dial in your settings.
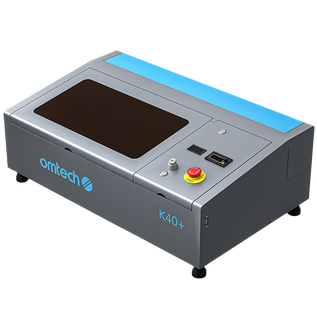
- New to cardboard cutting, or a hobbyist? Consider the OMTech K40+ 45W Desktop CO2 Laser Engraver, with a 300x200mm working area and a detachable honeycomb workbed, a solid, affordable entry point.
2. Diode Lasers (Best for Hobbies and Prototypes)
A 10W to 20W diode laser is sufficient if you primarily work with thin cardstock, craft chipboard, or thin (around 3mm) corrugated material for prototyping. Diode lasers are more affordable, but they process material more slowly and may need multiple passes on thicker pieces, which increases the risk of charring.
Cutting Cardboard with a Higher-Power CO2 Machine
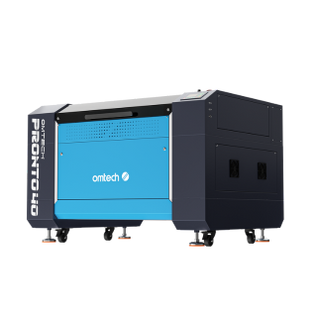
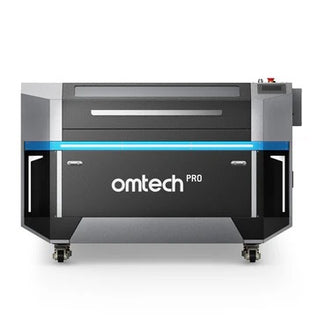
For higher-volume or larger-format cardboard cutting, the OMTech Pronto 40 90W CO2 Laser Cutter and Engraver, with a 900x600mm working area and autofocus, is worth stepping up to. Some standout features:
- Max engraving speed of 1,000mm/s, well suited to large-quantity production.
- An upgraded transmission system for tighter accuracy on every cut.
- A max workpiece height of 8.7 in.: an 83% increase over previous models, to accommodate taller items.
- A 3.2x air pump boost paired with a 318 CFM diagonal-flow duct fan to efficiently remove smoke and dust, with lower operating noise.
- A flame-retardant PC board that significantly reduces fire risk during operation, a meaningful safety feature given how fire-prone corrugated cardboard can be.

CO2 vs. Diode Lasers for Cutting Cardboard
| Laser Type | Best Cardboard Types | Recommended Model | Notes |
| Diode (10W–20W) | Paperboard, 1–3mm chipboard | Vevor 20W Enclosed Cutter | Great if you're a hobbyist or have entry-level experience |
| CO2 (45W–90W+) | All types, including heavy 6mm+ | OMTech K40+ 45W (entry-level); OMTech Pronto 35 60W or Pronto 40 90W (commercial) | Commercial/industrial standard, blazing fast and clean |
Both laser types cut cardboard effectively, but CO2 lasers are generally better for higher-volume cutting: they offer better safety features, can engrave at greater speeds, and are better suited to bulk work in a business environment.
Lower-power diode lasers (roughly 2.5W to 5.5W) are great for fine kerf precision, while 20W+ diodes and CO2 lasers handle thicker corrugated stock with ease.
What Are the Best Laser-Cut Cardboard Projects?
Cardboard is one of the most versatile, cost-effective, and satisfying materials to work with. Its applications span several distinct industries and hobby niches.
1. Rapid Prototyping and "Proof of Concept"
Before committing expensive materials like acrylic, hardwood, or marine plywood to the laser bed, cheap or free cardboard lets you test physical dimensions first.
- Dimensional testing: 3mm corrugated cardboard is great for prototyping; it gives a solid representation of the final project's dimensions.
- Joint and tolerance calibration: Test box tabs, finger joints, and interlocking slots to nail down tolerances before cutting the final wood or plastic pieces.
2. Custom Product Packaging and Display Boxes
Commercial sellers use laser cutters to avoid the high cost of ordering custom-sized shipping or display boxes in small batches.
- Custom-fit inserts: Design precise cardboard dividers and cradles to securely hold fragile products, like glassware or electronics, inside a shipping box.
- Dashed-line scoring: Instead of burning deep fold lines, use software like LightBurn to cut a "dashed" or perforated pattern, which creates clean folds without compromising the box's structure.
- Branded mailers: Engrave logos, social handles, or instructions directly onto flat mailers before folding.
3. Stacked 3D Terrains and Parametric Sculptures
Because cardboard is thick and uniformly layered, it's an ideal canvas for building dimensional objects through layering.
- Topographic maps: Cut individual geographic contour lines and stack them sequentially to build physical 3D maps.
- Sliced 3D models: Use software like Autodesk's Slicer for Fusion 360 to slice complex 3D digital objects, animal heads, and human faces into flat cardboard profiles that slide together on an interlocking matrix.
- Industrial art tributes: Cardboard laser cutting has even been used at an industrial scale; a well-known example is a full 1:1 scale operational car built from over 1,700 stacked, hand-glued sheets of laser-cut cardboard.
4. Architecture and Scale Modeling
Students and architectural firms rely on the precision of a laser cutter over a traditional utility knife to rapidly build miniature structures.
- Massing models: Quickly assemble geometric cityscapes from chipboard or corrugated sheets to conceptualize spatial layout.
- Structural details: Etch micro-details like window panes, brick lines, or roofing textures directly onto matboard or heavy paperboard.
5. Tabletop Gaming, Costumes, and Education
Because it's lightweight and safe to handle once finished, cardboard is a great foundation for custom games and educational projects.
- Wargaming terrain: Create scale buildings, ruins, and barriers for tabletop miniature games.
- Cosplay and props: Build lightweight armor frameworks or weapon shapes that can be structurally reinforced with resin or papier-mâché later.
- Educational kits: Prep classroom STEM kits, for example, building fully functional pinhole cameras out of dense black paperboard.

Cutting vs. Engraving Cardboard: Which is Better?
1. Laser Cutting Cardboard (Vector Mode)
Cutting means tracking the laser along a single vector path to cleanly slice through the material. Medium-to-high speeds combined with adequate power will zip through the fibers quickly.
For thicker double-wall corrugated sheets, the better approach is multiple fast passes at lower power, rather than a single slow, high-power pass; this helps prevent heavy burn marks. Max-pressure air assist is essential here: it pushes the laser plume down and blows out any flames hiding in the hollow fluting pockets of corrugated boxes.
2. Laser Engraving Cardboard (Raster Mode)
Engraving means moving the laser head back and forth rapidly (rastering), like an inkjet printer, pulsing to vaporize only the outermost top layer of paper.
Engraving cardboard is typically fine around 10–15% power and about 300mm/s speed, though this varies depending on your engraver and the type of cardboard. If power is set even slightly too high, the laser can burn straight through the thin top liner into the hollow interior.
A common complaint with cardboard engraving is that it leaves behind a messy, charcoal-like residue that smudges when touched. One workaround makers use: press a strip of tape onto the engraved area and peel it off; the residue lifts away on the tape without smudging. For larger volumes, a sticky lint roller works the same way.
The Middle Ground: "Scoring" (Vector Engraving)
Instead of raster-engraving large logos, you can try scoring. On cardboard, scoring treats the laser like a cutting line but with power dialed down low enough to cut only about 10% into the material.
This technique works well for creating perforated fold lines for custom cardboard packaging. It's significantly faster than standard raster engraving and leaves virtually no ash or soot.

Cutting vs. Engraving Cardboard: Quick Comparison
| Feature | Laser Cutting (Vector) | Laser Engraving (Raster) |
| Primary Goal | Slicing cleanly through material | Vaporizing the surface for dark marks |
| Speed Setting | High | Very high (300mm/s+) |
| Power Setting | Medium to high | Very low (10%–15%) |
| Air Assist | High pressure, max flow | Off or low pressure |
| Fire Risk | High (pockets can catch fire) | Extreme (soot and smoldering ash) |
Tips and Settings for Laser Cutting Cardboard
- Speed and power: Avoid running at 100% power to prevent flare-ups. Paperboard and cardboard often need slower speeds or multiple low-power passes to avoid gantry deflection and ash buildup.
- Air assist: You'll need a strong air pump to clear smoke; otherwise, it blocks the beam from reaching lower layers in thick corrugated cardboard.
- Folds and scores: Rather than trying to score thick cardboard, cut a dashed or perforated line for clean folding instead. In LightBurn, use the "perforation" or dashed-line setting to create clean folds without compromising structural integrity.
- Fume extraction: Burning cardboard always generates significant ash, soot, and smoke. Make sure you have a powered inline exhaust fan venting outside, or use a dedicated smoke purifier.
- Never leave the machine unattended: Cardboard (especially corrugated) is one of the highest fire-risk materials you can laser cut. A slight slowdown or a trapped pocket of heat can quickly ignite into an open flame. Keep a fire extinguisher nearby at all times.
Final Thoughts
Cardboard's appeal for laser work comes down to a simple trade: it's cheap and forgiving enough to make mistakes on, but precise enough to double as a real production material once you understand its quirks, particularly the fire risk that comes with corrugated stock. Getting comfortable with air assist settings, multi-pass cuts, and the difference between corrugated and non-corrugated board will do more for your results than any single machine upgrade.
That said, the machine does set your ceiling. A K40+ is a perfectly capable way to learn the basics on paperboard and thin chipboard, but if cardboard cutting becomes a real part of your production line, custom packaging, display boxes, bulk prototyping, stepping up to a Pronto-series machine with a larger bed and autofocus will save you real time and reduce the odds of a scorched, unsellable piece.
Whichever machine you're on, the fire-safety basics apply every time: strong air assist, multiple passes on anything thick, and never walking away while the laser is running.
You may also be interested in how to make wooden engraved pet ID tags, and how you can approach this project with cardboard.