













23 Spooktacular Halloween Laser Engraving Ideas for 2026
October represents one of the most profitable seasonal manufacturing windows for commercial laser businesses, print-on-demand shops, and independent makers across Australia. While the northern hemisphere associates Halloween with autumn leaves and crisp fall weather, the booming local demand for boutique party supplies, bespoke event styling, and personalized corporate merchandise coincides with our Australian spring.
To rank well under Google’s strict content quality systems, a blog post must move past shallow introductory fluff and generic listicles. It needs to provide real, actionable manufacturing insight.
Below is a technically overhauled, production-focused guide to executing 23 profitable Halloween laser cutter projects. Whether you run an industrial cabinet system, a mid-range workshop unit, or a compact desktop CO2 machine, here is how to optimize your materials, calibrate your hardware, and scale your workshop's seasonal revenue using LightBurn and OMTech laser technology.
Phase 1: High-Value Glass, Stone, & Cylindrical Engraving
Processing non-flat or brittle substrates requires specialized hardware configurations and strict thermal management to prevent fracturing.
1. Rotary Laser-Engraved Pumpkins
-
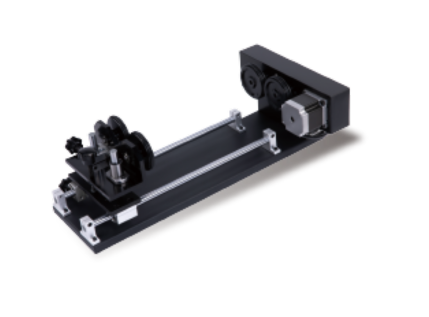
Technical Workflow: Traditional pumpkin carving can be elevated by using a CO2 laser to etch high-contrast vector graphics onto real or synthetic faux-pumpkins. For real pumpkins, mount the workpiece onto a specialized roller rotary attachment.
-
Machine Settings: Because organic pumpkin skin contains a high moisture content, utilize a lower speed and moderate power setting (e.g., 20% power on a 50W CO2 system) to vaporize the outer rind cleanly without scorching the underlying flesh.

2. Etched Glass Candle Holders
-
Technical Workflow: Etching detailed Halloween motifs onto glass votives allows internal flickering flames to project sharp, eerie shadows.
-
Expert Tip: To eliminate micro-cracking and achieve a smooth, frosted finish, apply a thin layer of wet dish soap or a damp paper towel over the engraving area before firing the beam. This acts as a thermal buffer, absorbing excess heat and preventing glass shards from flaking.
3. Ghostly Glass Lanterns
-
Technical Workflow: For larger cylindrical glass vessels, utilize a chuck or roller rotary extension to maintain a perfectly consistent focal length across the curved surface.
-
Software Calibration: Ensure your step-per-rotation parameters are perfectly calibrated within your controller software to avoid vertical stretching or distortion of your vector designs.

4. Halloween-Themed Stainless Steel Drinkware
-
Technical Workflow: Insulated travel tumblers are highly popular during the spring barbecue and outdoor event season.
-
Production Strategy: Use powder-coated or painted stainless steel blanks. The CO2 laser beam ablates the exterior coating to reveal the bright, raw stainless steel underneath. Set your raster processing to a high scanning density (300 to 400 DPI) to guarantee razor-sharp text on witty seasonal quotes.

5. Laser-Engraved Stone Coasters
-
Technical Workflow: Natural slate or stone coasters offer a premium alternative to cheap cork variants. Slate reacts beautifully to a CO2 laser, instantly turning from a dark grey to a high-contrast, bright off-white finish when engraved.
-
Production Strategy: Run the slate dry at a high speed. Once the engraving is complete, seal the coasters with a light coat of clear matte acrylic spray to deepen the stone's natural contrast and protect the etched artwork from condensation.
Phase 2: Acrylic Fabrication & Wearable Merchandise
Cast acrylic (PMMA) is the gold standard for creating high-gloss, premium event merchandise. Avoid extruded acrylic for engraving, as it melts and gums up along the edges.
6. Acrylic Pumpkin & Ghost Earrings
-
Technical Workflow: Fabricate lightweight, high-contrast seasonal jewelry using 3mm coloured cast acrylic sheets.
-
Machine Settings: When cutting intricate perimeter paths, set your Air Assist to maximum pressure. This instantly displaces volatile flammable gases from the cutting zone, eliminating unappealing melt marks and leaving a perfectly smooth, flame-polished edge directly out of the machine.

7. Fluid Skull Keychains
-
Technical Workflow: These are highly effective as low-cost, high-volume party favors or add-on items at checkout.
-
Production Strategy: Batch-process these items by nesting dozens of units tightly within a single sheet in LightBurn. Utilize two distinct software layers: one low-power raster layer to etch internal anatomical details, and one high-power vector layer to cut out the final profile.
8. High-Gloss Spooky Door Toppers
-
Technical Workflow: Intricate corner door accents and geometric wreaths cut from 4.5mm or 6mm jet-black glossy acrylic provide a sophisticated, architectural silhouette for entryway displays.
-
Expert Tip: Keep the protective paper masking intact on the acrylic sheet during the cutting process. This prevents vaporized residue from settling on the polished surface, completely saving you from tedious post-production cleaning.

9. Personalized Acrylic Place Cards & Name Tags
-
Technical Workflow: Upgrade traditional table settings by cutting pumpkin-shaped name place cards out of frosted or matte acrylic.
-
Machine Settings: For ultra-clean typography, utilize an OMTech Mid-Range or Desktop CO2 system with a small optical spot size (0.07 mm). This allows you to etch micro-text with flawless clarity, producing high-end results that cheap hobby diode lasers cannot replicate.
Phase 3: Premium Native Timber & Leather Crafting
Wood and leather items command excellent profit margins when processed with correct optical alignment and carbon-minimizing techniques.
10. Multi-Layered Haunted House Dioramas
-
Technical Workflow: 3D assembly art pieces—such as multi-tier graveyard or haunted house scenes—command premium price tags due to their structural depth.
-
Production Strategy: Use 3mm birch or Australian native timber plywoods. Stain individual sheets in contrasting shades (e.g., charcoal grey, deep orange, and walnut) before cutting. This ensures clean, unmarred surfaces that fit together seamlessly using engineered slot-and-tab connections.
11. Custom "Witches’ Brew" Menu Boards
-
Technical Workflow: High-end hospitality venues and spring cocktail parties require stylized menu boards listing seasonal drinks and mocktails.
-
Machine Settings: Use a solid timber blank like acacia or maple. To achieve a deep, dark, carbon-rich engrave without unappealing smoke staining around the edges, lower your machine's vector speed slightly and drop the Air Assist pressure to a gentle flow just strong enough to protect the focal lens.
12. Halloween Countdown Calendars
-
Technical Workflow: Interactive, reusable wooden calendars with sliding blocks or hanging numbers are excellent family heirloom pieces that stand the test of time.
-
Production Strategy: Standardize your finger-joint tolerances in your CAD software to match the exact thickness of your timber. Use your laser's automated focus sensor to guarantee identical, repeatable depth across all sliding components.
13. Halloween Character Window Silhouettes
-
Technical Workflow: Large-format character cuts placed in entryways or windows capture immediate attention from the street.
-
Production Strategy: Scale these designs efficiently by utilizing the generous bed dimensions of an industrial cabinet laser. This allows you to cut large, complex silhouettes from single sheets of 6mm MDF or plywood in minutes.
14. Intricate Cut Wooden Pumpkins
-
Technical Workflow: Elegant, delicate wood cutouts can be used as premium home decor accents or reusable luxury gift box toppers.
-
Expert Tip: To maintain perfect geometric accuracy on highly complex interior cutouts, always program your laser software to execute the inner vector paths first, before running the final outer perimeter cut. This prevents the workpiece from shifting in the honeycomb bed mid-job.
15. Spooky Laser-Cut Wooden Bookmarks
-
Technical Workflow: Thin, lightweight wooden bookmarks etched with detailed bat or witch motifs make highly popular, cost-effective retail items for local markets.
-
Machine Settings: Use ultra-thin 1.5mm timber veneers. Keep your processing speed high to minimize the heat-affected zone (HAZ), preventing thin wood sheets from warping during fabrication.
16. Articulated Posable Wooden Skeletons
-
Technical Workflow: Life-sized or tabletop articulated skeletons require perfectly circular pivot joints and consistent friction-fit dimensions.
-
Expert Tip: Calibrate your laser's kerf compensation (the width of the material removed by the laser beam) within LightBurn. This ensures that the interconnecting pin joints fit snugly together without requiring excessive glue or mechanical fasteners.

17. Wickedly Wonderful Wall Art
-
Technical Workflow: Modern, large-scale wood panels featuring clean minimalist geometry provide an elegant, artistic option for consumers who dislike traditional plastic Halloween clutter.
-
Production Strategy: Use high-contrast materials—such as mounting laser-cut matte black plywood figures onto a raw, natural oak backing board—to create a gallery-worthy piece.
18. Ouija Board Serving Trays
-
Technical Workflow: Transforming an ordinary wooden platter into a detailed conversational centerpieces relies heavily on high-density raster engraving.
-
Machine Settings: To manage large engraving fills efficiently on a solid timber board, run your laser head at high scanning speeds (above $400\text{ mm/s}$) with an optimized bi-directional scanning path to minimize total production times.

Phase 4: Fabric, Outdoor Decor, & Mixed Media
Expanding your material capabilities allows your workshop to capture unique market segments that cross over into apparel and outdoor events.
19. Customized Trick-or-Treat Bags
-
Technical Workflow: Moving away from generic plastic buckets, modern consumers prefer personalized, reusable canvas tote bags.
-
Machine Settings: Canvas and calico fabric respond beautifully to CO2 lasers. Run a high-speed, low-power raster pass to lightly singe the top layers of the fabric fibers. This leaves a clean, dark permanent mark without weakening the structural integrity of the bag material.
20. Halloween-Themed Leather Patches
-
Technical Workflow: Laser-cut leather patches offer a sophisticated, subtle way to customize caps, jackets, and winter bags.
-
Material Considerations: Always opt for genuine veg-tan leather over cheap faux-leathers containing PVC, which release toxic, highly corrosive chlorine gas when processed. After engraving, use the laser's high-speed vector beam to cut stitch holes directly along the perimeter for easy attachment.
21. Realistic Tombstone Lawn Décor
-
Technical Workflow: High-end front yard displays rely on realistic, weathered grave markers.
-
Material Considerations: Laser-cut and engrave lightweight exterior-grade plywood or dense insulating foam boards. The laser beam can deeply erode text into the material, creating an authentic, carved-stone look once coated with textured grey outdoor paint.

22. Functional Spooky Trivets & Pot Holders
-
Technical Workflow: Protect serving tables during seasonal gatherings with custom fabric or thick cork potholders.
-
Machine Settings: Thick natural cork is an excellent thermal insulator and cuts cleanly under a CO2 beam. Set your machine to a low frequency (PPI/Hz) to achieve a clean charred edge that highlights the spooky silhouettes of bats or witches without causing excessive smoke masking.
23. Interactive Haunted House Dioramas
-
Technical Workflow: Expand your product lineup by combining materials, such as cutting heavy cardstock for delicate window silhouettes and pairing it with a sturdy plywood exterior shell.
-
Production Strategy: Back the windows with translucent vellum paper, allowing users to place a safe, battery-operated LED tea light inside to bring the 3D haunted scene to life.

Hardware Guide: Choosing Your Production Engine
To successfully execute these projects at a commercial standard, you must understand the mechanical advantages of different laser architectures:
| Laser Configuration | Target Applications | Best-Suited Materials | Optimal Work Environment |
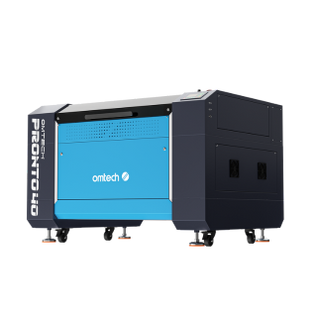
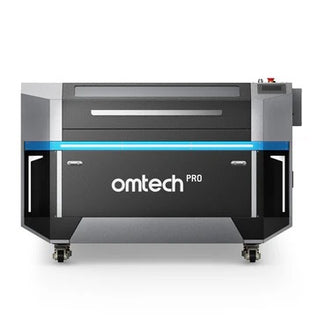
| Industrial Cabinet Systems (100W–130W) | Large-scale production, bulk B2B ordering, full-sheet processing, deep cutting | Thick timbers (12mm+), dense acrylics, heavy-duty signs, bulk batches | Dedicated workshops, commercial manufacturing units |
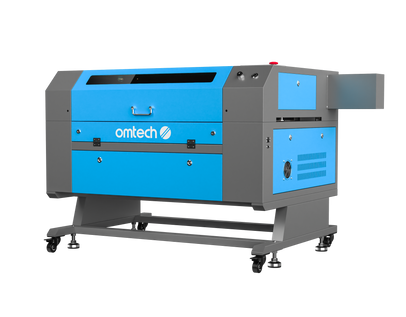
| Mid-Range Cabinet Units (60W–80W) | Versatile small business scaling, detailed contractual work, balanced engraving/cutting | 3mm to 6mm timbers, cast acrylic sheets, slate, genuine leather | Small business units, converted garages, makerspaces |
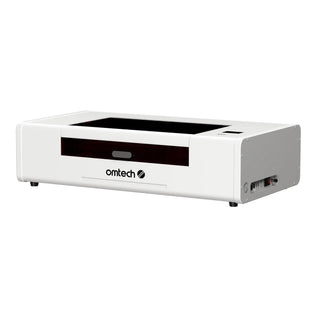
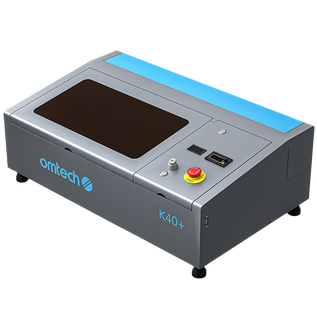
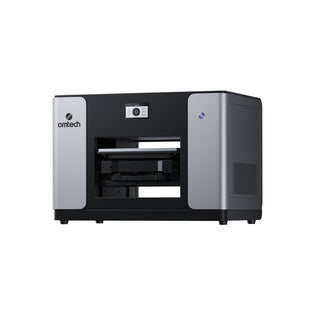
| Desktop CO2 Units (50W) | Boutique crafting, fine prototype design, localized customization, high-resolution detail | Thin veneers, anodized aluminum, glass etching, 3mm acrylic | Home studios, small retail storefronts, school D&T labs |
Maximize Your Seasonal Potential with OMTech Australia
The Australian laser engraving market rewards creators who innovate with professional materials, complex dimensional structures, and highly efficient manufacturing pipelines. It penalizes those who simply copy oversaturated, low-quality imports.
OMTech CO2 laser machines provide the raw cutting power, high verfahrgeschwindigkeit (travel speed), and industrial-grade mechanical rigidity required to bring these premium designs to market profitably. Equipped with high-torque stepper motors, precise linear rail guides, and advanced Ruida controllers, our systems deliver a seamless bridge between your digital vector files and professional physical products.
Every machine in the Australian OMTech lineup is backed by a comprehensive, local 2-year warranty alongside dedicated technical support based right here in the country. Ready to optimize your seasonal output and ensure your workshop is fully equipped for the peak manufacturing window ahead? Book a complimentary sales consultation with our technical team today at omtech.au. Join the OMTech family and transform your design ambitions into a highly scalable, profitable manufacturing pipeline.