















How to Clean a UV Printer Head
Your goal, when cleaning the printhead of a UV printer, should always be to restore consistent ink flow and optimal nozzle performance, but to do so without damaging the delicate printhead components. It is a process that is quite achievable, but requires a lot of care and attention, and above all, a good strategy. First, you need to make sure that you are using the manufacturer-recommended cleaning solution and you carry on in accordance with the manufacturer’s specific instructions (You can find them in your product manual or the official website of the manufacturer).
General Step-by-Step Cleaning Approach To Cleaning a UV Printer Printhead
Again, it is very important, especially in case of doubt or uncertainty, that you follow manufacturer-specific instructions when cleaning and unclogging a UV printer printhead. However, the general process usually begins with removing the dried ink, dust, and debris from the printhead, taking steps to maintain print quality, and ensuring consistent color and white output. Here is a step-by-step procedure that should work for a UV printer printhead
Step 1: Clean the Surface of the Printhead and Purge the Software
- Start by gently wiping away fresh or wet surface residue from the bottom face of the printhead. For this step, you need a lint-free polyester swab or cloth lightly moistened with UV cleaning solution. Wipe in one direction only and make sure you don't push debris into the nozzle plate.
- Attempt to clean/ purge the software from the control panel: Run a standard software-initiated print head cleaning or ink purge cycle from your printer's control panel.
- Check the dampers and lines: If purging does not work, inspect your ink dampers, lines, and white ink circulation system. Look out especially for heavy white titanium dioxide pigments that may have settled out.
Step 2: Do a Manual Syringe Flush (For Stubborn Clogs)
If the clogs are particularly stubborn, surface wiping and software purges may not clear the channels. This is when you advance to step two: a manual syringe flush. Here’s what to do:
- Fill up a clean syringe with UV print head cleaning solution.
- Disconnect the affected ink tube/damper from the print head inlet.
- Attach the syringe (filled with the cleaning solution) to the print head inlet.
- Then gently push or pull the solution through the channel. You must be very gentle, and do not force it with heavy pressure. Too much pressure can blow out or rupture the delicate internal nozzles.
- If you notice some particularly stubborn blockages, let a small amount of solution soak in the nozzle for a few minutes before flushing it clean. Don't leave it in there for too long, though: just about 3 to 10 minutes before flushing it out.
- Flush the channel with maintenance solution or fresh UV ink afterward so there is no harsh cleaning chemical left sitting inside.
Step#3: Clean Up and Prevent Future Clogging
Wipe down the rubber wiper blade and capping station alongside the head. Built-up UV ink here, if not taken care of, will re-contaminate the clean nozzles. Run an automated ink purge or test print through the printer software to verify that all color and white channels pull cleanly.
Important Safety Rule For Cleaning a UV Printer Printhead
Never use standard rubbing alcohol or acetone on UV printer heads. Alcohol and acetone are a huge risk because they can dissolve the glues and internal adhesives that hold the print head nozzles together. This will permanently ruin the head. Always use a dedicated UV-curable cleaning/flush solution recommended by your printer or head manufacturer (such as Epson I3200/XP600 flush agents).
How To Clean an Epson XP600 UV Printer Printhead
The Epson XP600 (many people know it as the F1080) is a very popular printhead that is used in many desktop UV printers, including the OMTech Spectra. As effective as this model is, it requires a lot of care and attention: its nozzle geometry is very tight, and it tends to clog (especially on the white ink channels).
Also, you need to be very careful when cleaning it because the internal manifold membranes of an XP600, just like many printheads, are fragile. Too much manual pressure from a syringe will permanently rupture the internal walls, which can destroy the printhead instantly.
Step 1: Use the "Soft Soak" Method (Highly Recommended)
Don't immediately pull any hardware apart or push liquid with a syringe; try the least invasive method first to dissolve overnight curing or drying. Try a cap soak instead:
- Turn off the printer so the carriage is unlocked.
- Clean the rubber capping station ring and the wiper blade using technical lint-free swabs and a specialized UV cleaning solution.
- Fill the capping station cup to the brim with your UV cleaning solution.
- Manually slide the carriage back over the capping station so the printhead is perfectly sealed over the fluid.
- Let it soak for 1 to 2 hours (or overnight) to soften the UV ink blockage.
- Turn the machine back on and execute one standard software cleaning cycle.
Step 2: Use The Syringe Pull (Safest Manual Method)
If a channel is entirely missing, do not make the mistake of aggressively pushing fluid down into it yet. Instead, use the machine's vacuum line or a syringe to pull ink down through the bottom, in a way that mimics the capping station. Here’s what to do:
- Disconnect the flexible tube from the bottom of the capping station cap.
- Connect a syringe to that tube.
- While the head is firmly docked on the capping station, slowly pull the syringe plunger back to draw a vacuum. This pulls ink and the blockage cleanly out of the nozzles and into the waste lines without stressing the internal head gaskets.
Step 3: Gentle Channel Flushing (Extreme Caution)
Channel flushing should be the last resort method for cleaning an Epson XP600 UV Printer Printhead. Ideally, you should not do this by yourself, but if you must flush a specific channel due to a stubborn blockage, follow this precise method:
| Tool Checklist | Crucial Safety Rules |
|
• 10ml to 20ml syringe • Small silicone tubing fit for XP600 nipples • Approved UV-specific solvent cleaning solution • Lint-free paper towels/microfiber |
Never use regular alcohol or acetone (they dissolve the internal glue). Keep ribbon cables dry. If cleaning fluid drips onto the 29-pin flat cables, it will short and fry both the printhead and the mainboard. |
- Remove the damper: Gently wiggle and pull up the damper of the clogged color channel to expose the small plastic ink intake nipple.
- Pack the base: Tuck lint-free paper towels completely around the base of the printhead to catch any fluid leaks and protect the bottom electronics.]
- Mount the syringe: Fill your syringe with 2–3 ml of UV cleaning fluid and attach the silicone tube to the nipple.
- Push with Minimum Force: Press the plunger incredibly slowly. If you feel hard resistance, STOP. You should only apply enough pressure to see a gentle rain or uniform mist of fluid shooting out from the bottom nozzle plate.
- If it shoots sideways or deflects, the nozzle is still partially blocked. Push a tiny bit more fluid through until it falls straight down and runs clear.
When To Replace Your UV Printer Printhead: The XP600 Reality Check
If you find that you are completely missing rows of nozzles or colors are bleeding horizontally into adjacent channels (e.g., yellow printing inside your cyan channel), this is a bad sign: your internal walls have blown.
The good news is that the XP600/F1080 heads are relatively affordable. You can typically find one for about 150–250 USD. So it is wiser and safer at this point to swap in a brand new head if a gentle flush doesn't fix it within a day.

Cleaning a UV Printer Printhead: White Ink vs. Color Ink Clogging
One very important issue to take into consideration when cleaning your UV printer printhead is whether it is the white ink or the color (CMYK) channels that are clogging. The reason this matters is that they are caused by entirely different physical issues.
Here is a simple explanation: in UV printing, CMYK inks are thin and dye- or light-pigment-based, whereas white ink relies on heavy, dense titanium dioxide particles that physically settle and separate.
So, because the mechanics of the clogs are fundamentally different, treating a white ink issue the same way you treat a CMYK issue is likely to be a misdiagnosis that will cost you much more money for repairs, or can even permanently ruin your printheads.
Here is how these problems differ and how to address each based on whether it is colored ink clogging or white ink clogging:
1. White Ink Clogging ( The Most Frequent Case)
White UV ink, by nature, has a high pigment density, which means it clogs far more easily than CMYK ink: the titanium dioxide settles like sludge if it isn't constantly moving. This is a problem because when it settles, you are no longer just dealing with a dirty nozzle: it is pigment sedimentation or a failure in the printer’s physical ink delivery system.
Here are three ways to address this issue:
- Check the agitation system: If the ink in the tank has settled, the problem is that you are pumping clear liquid into the lines while a thick sludge blocks the bottom. Ensure your printer's automatic white ink circulation or agitation tank is actually turned on and working.
- Inspect and replace the dampers: I have seen a lot of experienced printers note that even if you can pull ink with a syringe, there is a risk that the mesh inside the white ink dampers frequently becomes completely airlocked or caked with sediment, and that is very true. The actual fix is usually to swap out the damper
- The Software/RIP Check: If both white channels suddenly stop firing simultaneously while CMYK is perfect, it may be an issue with your RIP software mapping. Sometimes, it is software updates: when the software is updated, it inadvertently resets channel configurations, which can make it look like a physical clog when the printer simply isn't receiving data to print white.
2. Color Channel (CMYK) Clogging
A UV printer should rarely experience traditional ink clogs in its CMYK channels during normal operation. When a color channel fails, it is usually due to an environmental issue, an air leak, or a hardware failure. In other words, the real issue is likely to be external light exposure (curing the ink inside the head) or electronic burnout.
Here are three ways to address this problem:
- Immediately eliminate any source of stray light: If CMYK ink dries in the nozzles, it is usually because ambient UV light or stray reflections from the UV curing lamp bounced under the carriage and cured the ink. Never use a flash when inspecting the print head, and ensure the machine is shielded from open windows or bright lights.
- Perform an ink fill for the air pockets: If a color channel suddenly drops out, it is very likely that this is happening because air has gotten trapped in the lines or the damper. Run an "ink fill" or standard purge cycle through your software to push the air pocket out.
- Check for electronic burnout: If a single color channel (like magenta) goes from perfectly fine to completely dead with zero deflection or partial spraying, it may be a printhead burnout or loose ribbon cable rather than a physical clog. Try reseating the Flexible Flat Cables (FFC) on the printhead to see if the channel restores.

Preventative Maintenance Tips For UV Printer Printheads
- Print daily: printing something every single day (even a small test pattern) is the best way to prevent UV ink from curing or settling in the nozzles.
- Maintain the capping station: Regularly clean the wiper blade and capping station with manufacturer-approved swabs and fluid so the head stays sealed and moist when parked
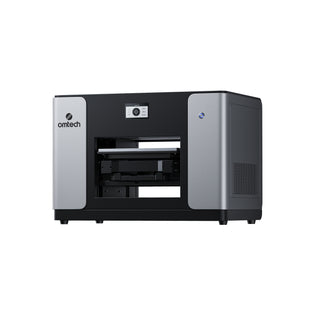
One way to ensure you don't constantly have to worry about frustrating breakdowns and costly maintenance is to make sure you get a UV printer that combines versatile printing capabilities with practical maintenance features. In other words, you need to check out the OMTech Spectra A3+ UV Printer.
The OMTech Spectra A3+ UV Printer is available in single-head and dual-head configurations; it offers a 13.8 × 17.7-inch printing area for creating custom designs on products such as acrylic signs, promotional items, phone cases, and other compatible materials.
- Its automatic printhead maintenance features can help simplify routine upkeep, while its white-ink capabilities support printing on dark or transparent substrates.
- As with any UV printer, you'll still need to follow the manufacturer's cleaning procedures and keep the printhead, wiper blade, and capping station in good condition.
If you run a small business and are looking to produce customized products, the Spectra A3+ offers a practical starting point worth exploring.
Final Thoughts
Again, cleaning a UV printer printhead is about more than restoring print quality; it's about preventing avoidable damage and extending the life of an expensive component.
Always start by checking the manufacturer’s procedure for cleaning, but you can start with the manufacturer's recommended cleaning procedure, use only approved cleaning solutions, and avoid forcing liquid through stubborn clogs.
Pay particular attention to white ink circulation, the capping station, and regular test prints to catch problems early. If gentle cleaning fails to restore nozzle performance, consult the manufacturer or a qualified technician before attempting more invasive repairs.
Remember, consistent preventative maintenance is usually easier and less expensive than replacing a damaged printhead.
You may also be interested in this complete guide on how to make money with a UV printer.