














How to Print on Wood With a UV Printer
Wood has always been a favourite material for makers, sign shops, gift businesses, and creative studios. It is affordable, easy to source, and brings a natural warmth that instantly adds character to finished products.
With UV printing, wood becomes even more versatile. Instead of relying on vinyl, transfers, decals, or finishing sprays, you can print full-colour graphics, photos, text, and branding directly onto the surface. The result is a professional, durable finish that is ideal for personalised gifts, signage, décor, and branded products.
In this guide, we’ll explain how UV printing on wood works, how to prepare your artwork, how to position materials accurately, and how a machine like the OMTech Spectra UV Printer can help Australian makers and small businesses build a repeatable production workflow.
Why UV Printing Works Well on Wood
Wood can be challenging for traditional printing methods because it is naturally porous and textured. Standard inks may soak into the grain, causing colours to appear dull or edges to lose sharpness.
UV printing solves this problem by using inks that cure instantly under ultraviolet light. Rather than soaking into the wood fibres, the ink hardens on the surface, creating a crisp and durable printed layer.
This makes it possible to achieve:
- Sharp text and fine details
- Vibrant full-colour artwork
- Durable surface graphics
- Fast production with no drying time
- Professional results on natural materials
Because the ink cures immediately, printed wood pieces can be handled, packed, displayed, or further processed straight away. For small businesses managing custom orders or batch production, this helps reduce waiting time and improve turnaround.

What You Need to UV Print on Wood
To print on wood, you’ll need a flatbed UV printer capable of handling rigid materials.
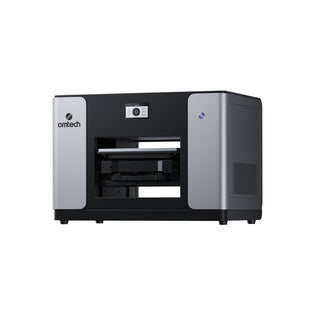
For this type of workflow, the OMTech Spectra UV Printer is designed to print directly onto materials such as wood, acrylic, leather, coated metal, plastic, glass, and more.
You’ll also need:
- A clean wood surface, such as birch, plywood, MDF, or timber panels
- Artwork or design files
- OMTech Print software
- A measuring tool
- Painter’s tape or positioning guides
- A clean cloth for surface preparation
Birch wood is a popular choice because it has a smooth surface and light colour, which helps printed colours appear bright and clear. However, many other woods can also be used depending on the desired finish and product style.
Preparing Your Artwork
Start by creating or importing the image you want to print.
This could be:
- A logo
- A photo
- A name or message
- A decorative illustration
- A product label
- A custom design for gifts or signage
Once your file is imported into OMTech Print, adjust the size of the artwork to match the available area on your wood piece.
For best results, measure the print area on the actual material rather than estimating. Entering accurate dimensions helps ensure the final print appears exactly where you want it.
After setting the size, the artwork will appear in the software workspace as it will be printed.
Positioning the Wood Accurately
Accurate positioning is one of the most important steps when UV printing on wood.
Because flatbed UV printers do not automatically know where your material is placed, you need to define the print position using X and Y coordinates.
A simple way to do this is to use a test piece first.
Place your wood on the printer bed and mark its edges with painter’s tape. These guides help you position future pieces in the same location.
Next, print a small test image and measure how far it is from your desired position. Adjust the X and Y values in the software until the design lands correctly.
Once the correct position is found, save or record these coordinates. If you continue using the same board size and placement guides, you can reuse the same settings for future jobs.
This setup step may take a little time at the beginning, but it makes production much faster and more consistent later.
Printing the Final Design
Once your artwork is sized and the position is calibrated, the printing process is straightforward.
Place the wood onto the printer bed using your tape guides, confirm the saved X and Y settings in OMTech Print, and start the print job.
The Spectra applies UV-curable ink directly onto the wood and cures it instantly with its built-in UV-LED curing system.
When printing is complete, the wood is ready to handle immediately. There is no smearing, no drying time, and no additional coating required for standard indoor applications.

Creating a Repeatable Production Workflow
Once your setup is dialled in, UV printing on wood becomes highly repeatable.
By using consistent board sizes and placing each piece in the same position, you can produce multiple products with the same settings.
This is ideal for batch production of:
- Wooden signs
- Custom plaques
- Ornaments
- Coasters
- Branded décor
- Name boards
- Wedding signage
- Personalised gifts
- Retail display pieces
Many workshops keep permanent tape guides or jigs on the printer bed to speed up positioning and reduce setup time.
Because the workflow is digital, it is easy to personalise each piece with names, dates, logos, or custom artwork without changing the physical setup.
Product Ideas for UV Printing on Wood
UV printing on wood opens up a wide range of product opportunities for Australian makers and small businesses.
Popular ideas include:
- Personalised family name signs
- Café and restaurant menu boards
- Wedding welcome signs
- Corporate gift boxes
- Custom photo plaques
- Wooden ornaments
- Nursery name signs
- Branded coasters
- Market stall signage
- Home décor panels
Wood’s natural texture gives each product a warm, handcrafted feel, while UV printing adds colour, detail, and professional branding.
Beyond Wood: More Materials, More Opportunities
One of the biggest advantages of investing in a UV printer is versatility.
The same machine used for wood can also print on:
- Acrylic
- Leather and faux leather
- Coated metals
- Plastics
- Glass
- Ceramic tiles
- Promotional products
This allows businesses to expand their product range without needing a separate machine for every material.
For growing workshops, this flexibility makes it easier to test new ideas, respond to customer requests, and build multiple revenue streams from one production setup.
Why Choose the OMTech Spectra UV Printer?

The OMTech Spectra UV Printer is designed to make workflows like this accessible to growing shops and creators.
It offers an A3-size flatbed, high-resolution printing using Epson technology, and support for CMYK color, white ink, and clear varnish layers. Print speeds reach up to 2.39 square meters per hour, allowing for efficient production runs even on larger batches.
Built-in ink circulation helps prevent clogging, while automated maintenance routines reduce downtime. OMTech Print software simplifies the process by combining image setup, RIP processing, and printer controls into one interface, removing the need for multiple programs.
Together, these features make printing on wood reliable, repeatable, and scalable.
Final Thoughts
UV printing transforms wood from a simple craft material into a high-value product surface. With the right workflow and a capable machine, you can create professional, durable, full-color designs directly on wood in minutes.
Using the OMTech Spectra UV Printer, the process becomes straightforward: size your artwork, position it accurately, print instantly, and move on to the next piece. Once your setup is dialed in, batch production becomes fast and predictable.
And since UV printing works on so many materials beyond wood, it provides long-term value as your business grows.
Ready to expand your workshop with full-color printing on wood and beyond? The upcoming OMTech Spectra UV Printer delivers professional performance in a compact, small-business-friendly system—bringing durable, high-resolution UV printing within reach.