


Curved Object Engraving: Can Lasers Handle Spheres & Bottles?
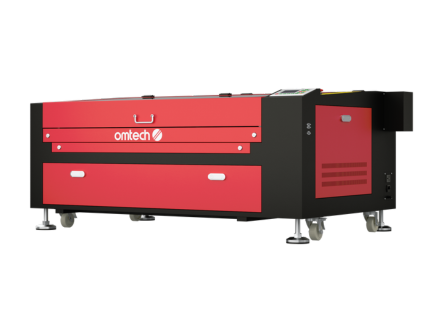
Engraving on flat surfaces? That’s a walk in the park. But once you start working with curved objects—think glass bottles, metal flasks, or round ornaments—it can get a bit trickier. The great news is that OMTech laser machines make creative engraving on these complex shapes totally achievable. In this guide, we’ll walk you through engraving on curved surfaces using handy tools like rotary attachments and laser techniques that allow you to customise anything from a wine bottle to a metal sphere. With the right setup, you’ll see just how smooth and enjoyable curved engraving can be.

Getting Comfortable with Curved Surface Engraving
Curved objects need a slightly different approach compared to flat surfaces—and yes, this includes spheres! Don’t stress though; with the proper tools and a few tweaks to your technique, you’ll be able to get professional results.
Here’s what makes laser engraving on curves possible:
-
Precision Focus: OMTech’s adjustable focus keeps the laser beam sharp, even as the surface moves in and out along the curve.
-
Depth Awareness: Curved items change distance from the laser head constantly, so keeping this in mind is essential for a clean, even engraving.
-
Material-Specific Settings: A glass bottle reacts differently to a laser than a metal sphere. Adjust speed, power, and focus according to the material for best results.
Step-by-Step: How to Engrave Curved Surfaces with OMTech
Whether it’s your first time or you’re a seasoned user, here’s a simple process for successful engraving on rounded items:
Step 1: Select and Prepare Your Item
Pick your object—a stainless steel tumbler, a glass bottle, or a festive ornament. Give it a good clean to remove dust, oils, or fingerprints that could affect the engraving.
Step 2: Secure It
This is where a rotary attachment comes in handy. Think of it like a small turntable that rotates your item smoothly while the laser engraves. Make sure everything is firmly in place to prevent any movement during the process.

Step 3: Adjust Your Focus
Curves affect the laser’s focal depth, so it’s critical to set this correctly. OMTech machines make focus adjustments straightforward, and spending time calibrating ensures crisp results across the whole engraving.
Step 4: Load Your Design and Set Parameters
Open your artwork in the software. For rounded objects, consider slightly distorting the design to wrap it correctly. Then adjust speed, power, and frequency based on your material. Unsure? Test on a scrap piece first.
Step 5: Start Engraving and Monitor
Once you hit go, keep an eye on the job. If anything shifts or looks off, pause and adjust. After engraving, inspect your piece and clean it up if necessary.
Tools That Make a Difference: Rotary Attachments & Focus Controls
What’s a rotary attachment exactly? Imagine trying to engrave a wine bottle by hand—it’s tricky. The rotary attachment spins the item consistently, removing guesswork and hand fatigue.
Focus adjustment is just as important. Curved surfaces mean the laser height changes constantly. If your focus isn’t correct, you risk patchy or blurry results. OMTech machines include built-in focus controls so you can lock in a crisp line from start to finish.
The best part? You don’t need to be a tech expert—these features are ready to use straight out of the box.
Engraving Different Curved Materials
OMTech handles a wide range of curves and materials:
-
Glass Bottles: Ideal for gifts or custom drinkware. Use low power and slow speeds to avoid damaging the glass.
-
Curved Glass Items: Take your time, keep power low, and fine-tune the focus for excellent results.
-
Curved Metal Objects: Metals conduct heat differently, so adjust feed rate and power to avoid double burns or glare.
-
Cylindrical or Ornamental Shapes: Consistency is key. The OMTech rotary keeps the engraving uniform as it wraps around curves.
Quick Tip: Success comes down to three things—using a rotary attachment, proper focus, and design software that accommodates curves.

Tips for Cleaner Curved Engravings
To get professional results every time, keep these in mind:
-
Always Test First: Use scrap items with a similar shape and material before committing to the final piece.
-
Slow Down: Slower engraving lets the laser adapt to the curves for sharper lines.
-
Keep Surfaces Clean: Dirt, smudges, or debris on the object or laser lens can ruin clarity.
-
Adjust When Needed: Materials behave differently. Trust your instincts to tweak speed or power.
-
Maintain Your Laser: Regular lens and rotary maintenance ensures top performance and longer machine life.
Follow these tips, and curved engraving will become second nature.
FAQ: Quick Answers for Curved Engraving
Q: Can OMTech lasers engrave spheres?
Yes! With a rotary attachment and proper focus, spheres and other rounded objects are easily engraved.
Q: How do I handle curves on bottles or glassware?
Use focus adjustments along the object’s path, attach a rotary, and engrave at a constant height. Always run a test first.
Q: Do curved metals need different settings than glass or plastic?
Absolutely. Metal usually needs lower power and slower speed. OMTech also provides material presets to simplify switching between materials.