Mastering Free Design Tools for Stunning Laser Engraving with OMTech
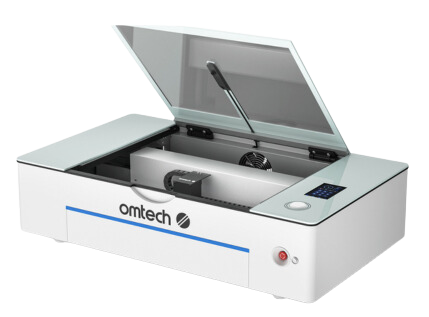
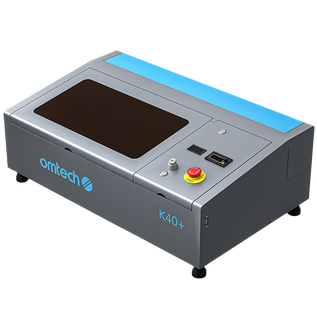
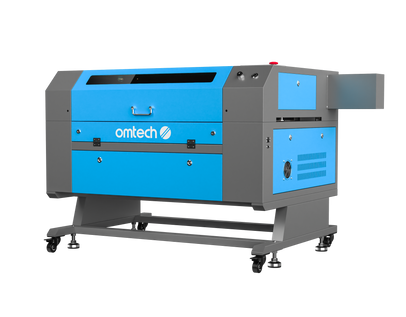
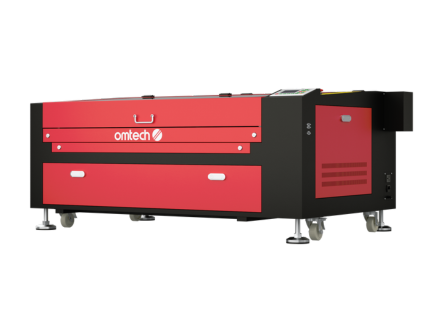
Dreaming of turning your brilliant ideas into beautifully engraved reality on wood, acrylic, or even leather? Your trusty OMTech laser engraver – whether it's a versatile CO2 laser from their impressive range or another model – is the powerhouse ready to bring your vision to life. The beauty is, you don't need fancy, expensive software to achieve pro-level results. This guide, tailored for our Aussie mates, will show you how to harness top free design tools alongside your OMTech laser to create stunning, high-precision engravings and cuts. Let's dive in and unlock your creative potential!
Why OMTech Laser is Your Perfect Creative Partner Down Under
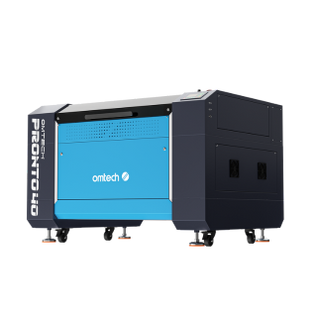
An OMTech laser engraver isn't just a machine; it's your gateway to blending high-quality digital precision with the authentic charm of handcrafted artistry. Perfect for the shed, the home studio, or a growing small business, OMTech laser machines deliver the clean cuts and intricate engravings that make personalised gifts, signage, or bespoke products truly shine. And the best part? They pair seamlessly with easy-to-learn (and often free!) design software like Inkscape, free CAD programs, and more. Discover the full potential at OMTech Laser Australia.
Choosing Your Digital Toolkit: Free & Powerful Options for Aussies
Your laser engraver is only as capable as the designs you feed it. Choosing the right software makes all the difference, and thankfully, there are fantastic free and accessible options perfect for Aussie makers:
- Design & Laser Software: These are your essential mates for sketching, tweaking, and perfecting your artwork before it hits the laser bed. Think of them as your digital workshop.
- Inkscape (Free & Powerful): The absolute go-to free vector editor for laser work. Brilliant for creating scalable designs, manipulating paths, and preparing files for engraving and cutting. Highly recommended for starting out and staying cost-effective! We'll cover specific setup tips for your OMTech laser later.
- Free CAD Programs (For Precision & Structure): Need technical precision for boxes, joints, or mechanical parts? Look at FreeCAD or LibreCAD. Fusion 360 also offers a generous free hobbyist license and is superb for more complex 3D modelling that translates into laser-cut assemblies.
- Tinkercad (Free & Beginner Friendly): Absolutely ripper for beginners or anyone wanting a simple, browser-based drag-and-drop experience. Great for basic shapes, text, and getting a feel for design before moving to more complex software.
- Blender (Free & 3D Powerhouse): While primarily for 3D animation, Blender is incredibly powerful for creating complex 3D models that can be sliced for laser engraving onto curved surfaces or creating depth effects. Steeper learning curve, but immense potential.
- SketchUp Free (Visual & Simple): Great for spatial planning and visualising projects before committing to cuts. The free web version works well for basic laser design concepts.
Blending these free tools with the precision capabilities of your OMTech CO2 laser engraver truly opens up a world of creative possibilities right from your Aussie workshop.
Your Aussie-Friendly Guide to Laser Engraving with OMTech: 5 Simple Steps
New to the game or looking to streamline your process? Follow this straightforward, no-nonsense roadmap to engrave like a seasoned pro:
1. Pick Your Perfect "Canvas" (The Right Wood/Mat'l): Just like a painter needs a good canvas, your choice of material is crucial. For wood engraving, aim for clean, flat pieces with minimal knots or wild grain – they can cause inconsistent burns. Aussie favourites like Hoop Pine or Celery Top Pine offer great results, but don't be afraid to experiment! Test different woods on your OMTech laser – some engrave deeper (like Basswood), others give a lovely dark contrast (like Plywoods). Hardwoods like Jarrah or Blackwood can produce stunning, dramatic effects but may require careful power/speed settings. Find the perfect machine for your material size at the OMTech Mid-Range Laser Engravers collection.
2. Craft Your Design with Free Software: Fire up Inkscape, FreeCAD, or Tinkercad. This is where your idea takes shape. Sketch your design, refine lines, play with patterns, and optimise it for the laser. Think clean lines and vector paths where possible for sharpest results. Save your file in a laser-ready format like SVG or DXF, compatible with your OMTech laser engraver's control software (like LaserGRBL or LightBurn).
3. Set Up Your OMTech Laser Like a Pro:
Securely place your material on the laser bed – use masking tape or weights if needed to prevent any movement mid-job. Safety first, mate!
Focus the Laser: This is vital for sharp engraving and clean cuts. Use your machine's focus tool (often a gauge or auto-focus) to get the laser spot precisely at the surface of your material.
Dial in Power & Speed: This is the magic formula and varies hugely based on material, thickness, and desired effect (engrave vs cut). Start with your OMTech laser's recommended presets (often found in manuals or online communities) as a baseline. Always run a test on a scrap piece of the same material! Tweak power (higher = deeper/darker) and speed (slower = deeper/darker) until you get the perfect result. Software like Inkscape often has extensions allowing direct control over these settings per object.
4. Let Your OMTech CO2 Laser Work Its Magic: Hit the start button and watch your design come to life! It's mesmerising. Stick around, especially for the first pass of a new design or material, to ensure everything is running smoothly and safely. Keep that extraction fan running!
5. Add Those Finishing Touches: Once the job's done and the machine is safe, carefully remove your piece. Wipe away any residue (smoke/soot) with a soft cloth or isopropyl alcohol. For wood, consider adding a finish like Danish oil or a clear lacquer – it enhances the grain, protects the engraving, and gives it that truly professional, gallery-worthy sheen. A bit of sanding around cut edges can also work wonders.

Why Mixing Free Software Supercharges Your OMTech Laser Creativity
Your OMTech CO2 laser engraver becomes an absolute powerhouse when you leverage multiple free design tools in your workflow. Don't limit yourself to just one!
- Combine Vector & CAD: Use Inkscape for intricate decorative elements and text, then import into FreeCAD for precise structural design of a box or stand.
- Add 3D Flair: Create a complex 3D model in Blender, slice it into layers, and engrave the depth map onto wood using your OMTech laser for stunning topographic or portrait effects.
- Vector Precision: Programs like Inkscape excel at creating sharp, infinitely scalable vector graphics ideal for clean engravings and intricate cuts.
- From Digital Doodle to Physical Marvel: Sketch an idea on paper, scan it, trace it in Inkscape, and let the laser engraver bring it into the real world with incredible precision.
When you combine these free tools with the reliability and precision of an OMTech laser, it's like giving your creativity a serious turbo boost. Explore the full spectrum at the OMTech Laser Engraving, Cutting and Marking Machines collection.
Pro Tips from the Shed: Level Up Your Aussie Laser Game
Want consistently better results or a smoother arvo in the workshop? Here are some hard-earned tips:
- Embrace the Test Piece: Seriously, always run a test on scrap material identical to your final piece. It saves heartache and wasted good timber.
- Master Your Material Library: Build a reference of power/speed settings for different woods, acrylics, etc., on your specific OMTech laser engraver. Humidity and even wood batch can affect results!
- Community is Key: The Aussie maker community is fantastic. Tap into online forums (like Aussie based laser groups on Facebook), YouTube tutorials (search "Inkscape laser setup OMTech"), and local maker spaces. Loads of shared wisdom on using free CAD, Inkscape, and troubleshooting.
- Harness Software Presets: Once you nail settings for a specific material/effect in your laser control software or Inkscape extensions, save them as presets! Huge time saver for repeat jobs.
- Keep it Clean: Regularly clean your laser lens and mirrors (carefully, with appropriate cleaner and lens tissue!) – a dirty lens scatters the beam and reduces power/quality. Also, ensure good extraction – essential for safety and preventing residue buildup on your work and the machine.
- Mind the Aussie Climate: Extreme heat or humidity can sometimes affect material behaviour or machine cooling. Be mindful on stinking hot days.
FAQs for Aussie Laser Enthusiasts
Q: What software actually works well with my OMTech Laser?
A: Heaps! Start simple and free with Inkscape (brilliant for most engraving/cutting) or Tinkercad. For technical parts and 3D modelling, dive into FreeCAD or Fusion 360 (free for hobbyists). If you need industrial-grade power (and have the budget), CorelDRAW or Adobe Illustrator are top-tier vector options. Your OMTech laser is very flexible software-wise!
Q: How do I set up Inkscape properly for my OMTech CO2 laser engraver?
A: Key steps: 1) Set your document/page size to match your material. 2) Design using vector paths (strokes) for cuts and fills (or hatches) for engraving areas. 3) For cuts, set a very thin stroke width (e.g., 0.01mm). 4) Crucially, use extensions (like the popular "Laser Tool" or "J Tech Photonics" plugins) or manually assign colours/objects to specific power/speed settings that your OMTech laser control software (e.g., LightBurn, LaserGRBL) recognises. ALWAYS TEST ON SCRAP FIRST!
Q: Is an OMTech laser engraver suitable for beginners in Australia?
A: Absolutely! OMTech machines are known for being relatively straightforward to set up and offer excellent value. Their compatibility with free software like Inkscape keeps costs down while you learn. Plus, there's a massive and supportive online community (including plenty of Aussies) ready to help you troubleshoot and learn. Take your time, experiment safely, and you'll be creating impressive work in no time. Check out beginner-friendly options in the OMTech Mid-Range Laser Engravers collection.


