Beat Laser Overheating: Practical Maintenance Tips for OMTech Engravers
Using an OMTech laser engraver is an exciting way to bring your designs to life—whether you’re creating custom signage, personal gifts, or intricate patterns for your small business. These machines are designed for accuracy and efficiency, but like any high-performance tool, they need regular care to stay in top shape.
One of the most common challenges engraver owners face is overheating. Left unchecked, heat build-up can affect your machine’s performance, reduce its precision, and shorten its lifespan. The good news? With a few simple maintenance habits, you can avoid overheating and keep your engraver running smoothly.
In this guide, we’ll take a closer look at why overheating happens, the signs to watch for, and the best maintenance tips to keep your OMTech laser performing at its best.
Why Laser Overheating Happens
Think of your laser engraver like a car engine. If you don’t service it regularly, or if you push it too hard for too long, it eventually struggles to keep up. Laser engravers are no different. Overheating is often caused by:
- Long operation times without breaks
- Poor ventilation or cooling systems that can’t keep up
- Dust and debris build-up, which insulates heat in the wrong places
- Worn-out belts or misaligned mirrors, forcing the machine to work harder
- Incorrect settings that put unnecessary strain on the laser
When a machine overheats, it doesn’t just impact the current project—it can reduce accuracy over time, damage components, and even increase fire risk.
Warning Signs of Overheating
Catching the early signs of overheating can save you a lot of frustration (and costly repairs). Look out for:
- Unusual noises – grinding, squealing, or clicking sounds often point to stressed components.
- Slower engraving speeds or inconsistent performance mid-job.
- Burnt or uneven engraving results, which suggest excess heat.
- Unexpected shutdowns as the machine attempts to protect itself.
- Visible smoke or stronger fumes than usual, a sign the heat is too intense for the material.
Five Easy Steps to Prevent Overheating
Preventing overheating is far easier than repairing an overheated machine. Here’s a straightforward five-step routine that works well for OMTech users.
1. Choose the Right Materials
Poor-quality or unsuitable materials make your engraver work harder than it needs to. Always use clean, flat materials that are appropriate for laser engraving. For timber, stick to dry, evenly grained pieces without paint or residue. For acrylic, avoid recycled or scratched sheets.
By working with quality materials, your engraver maintains accuracy without unnecessary heat build-up.
2. Fine-Tune Your Software and Design
Glitches in design files can overload your laser. Always use up-to-date engraving software that integrates seamlessly with OMTech systems. Double-check your design file for errors, ensure the correct format, and test settings before committing to long jobs.
A quick test cut saves time and prevents your machine from running hotter than necessary.
3. Inspect Before Every Job
Just like you wouldn’t drive a car without checking the tyres, it pays to give your engraver a once-over before use. Take a minute to:
- Check belt tension and replace any fraying parts.
- Clean and align mirrors to keep the laser beam efficient.
- Remove dust from rails and fans.
This tiny habit prevents heat from building up in the wrong places.
4. Monitor While It’s Running
Never leave your machine unattended while it’s operating. Many OMTech engravers display real-time temperature data—pay attention to it. If the system warns of rising heat, pause the job and let the cooling system bring the temperature down.
It’s the equivalent of giving your machine a water break—it ensures performance doesn’t drop off mid-project.
5. Allow Proper Cool Down
When the job is done, give your engraver a rest before starting the next project. Use the downtime to check:
- Mirror alignment – slight shifts can increase strain.
- Rails and belts – ensure smooth movement.
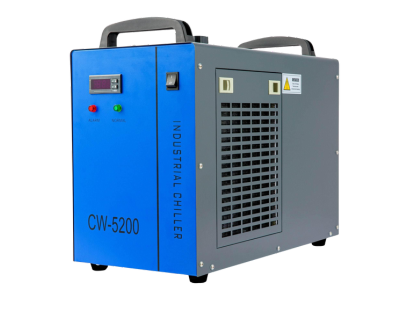
- Cooling system – confirm fans or water pumps are running properly.
This post-project habit ensures your next engraving starts with a machine that’s fresh, clean, and ready to go.
Learn More Maintenance Tips Prevent Laser Engraving Machines from Overheating.
Your Ongoing Maintenance Checklist
A proactive maintenance routine doesn’t need to be complicated. Here’s a checklist you can stick to weekly or monthly:
- Clean lenses and mirrors with the proper wipes
- Vacuum or dust rails and fans
- Check belts for slack or wear
- Align mirrors every few projects
- Inspect your cooling system (air or water-based) for blockages
- Update your software for stability and new features
Set reminders in your calendar—treat your engraver like any other precision tool. A little upkeep saves major downtime later.
Troubleshooting Common Issues
Even with regular care, issues pop up. Here’s how to handle them on the fly:
- Machine too hot: Check fans, cooling lines, and filters for dust. If water-cooled, make sure the pump is flowing properly.
- Odd noises: Grinding often signals debris on the rail or worn belts.
- Engraving quality drops mid-job: Stop, clean mirrors, and check alignment. Look for slack belts or dirty rails.
- Frequent shutdowns: This usually points to overheating. Reduce job duration, improve ventilation, and check the cooling system.
Read more maintains tips: https://www.omtech.au/blogs/news/why-your-laser-isn-t-firing-and-how-to-get-back-to-engraving-fast.


